We are huge fans of Eric Carle in our house and I think it's safe to say that his book Brown Bear, Brown Bear is mostly responsible for teaching our girls their colors.
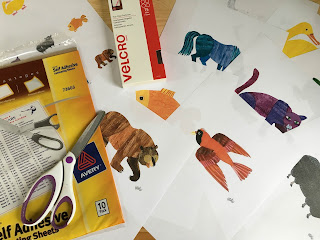 |
| Supplies needed: Eric Carle's Images printed in 2 sizes, Self-Laminating sheets, Velcro Sticky-Dots, Scissors |
Of course, as mom and dad we will take some credit for reading it to them at least 796 times (per child), but the repetitive, predictable stanzas are toddler heaven and they just can't resist the simple, colorful images throughout. It is also one of the first books that our girls proudly said they could "read all by themselves." The simplicity of it, plus the frequency of our readings, lead to inevitable memorization.
Now we are on to child #3 and he is also totally obsessed with the book, though I have to admit about a third of the readings are now done by his sisters rather than mom and dad. As is a common feeling among parents by child #3, I wonder how many skills he is learning by default rather than by design. #thirdkidproblems
 |
| Little man literally couldn't wait to get his paws on these cards. |
I don't harbor too much guilt for for #3's default learning style. I mean, the guilt-ship sails in all the time, I just try not to let it drop anchor. I know he is moving right along and a happy, well-adjusted kid. That said, in a moment of, "wait…should my toddler be able to identify his colors yet?" (even if he can't clearly verbalize them)…I thought of a fun activity that I could put together for him. In truth, the answer is, "He's doing fine. All in good time." But it was basically an excuse for me to focus on a
designed learning activity for kid #3 rather than the more frequent
default learning.
I can't take credit for this fun idea. When our middle daughter was about 18 months old she saw a speech therapist for about a year to pull out some language that was just taking its time. This was a favorite activity of her's and now seems like a great time to recreate it to use with my son. He
LOVES it. (*The hide-and-seek version is his favorite! - see suggestions below)
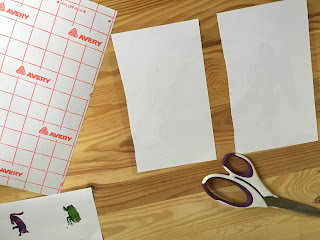 |
| To use less of the self-laminating sheets, I made our large animal cards 1/2 of an 8.5x11 sheet each. |
Print the full size color images for each animal and either have your office supply store laminate them, or use the simple 3M brand self-lamination product. (about $6)
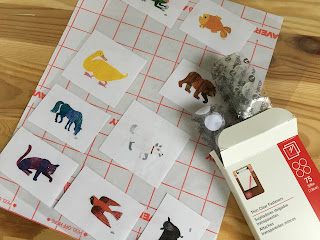 |
| Homemade does not need perfection. In my teacher days these would have been made using the large paper-cutter, but scissors do the trick and add that homemade touch of love. |
Cut apart the smaller image cards and laminate those individually as well.
Apply sticker velcro dots to the cards. The matching half of the velcro will go on the coordinating full-size photo sheet. (About $4)
 |
| "I see a red bird looking at me!" |
A variety of activities can be done using these cards. Here are a few ideas to get started:
*Set all the cards out and simply ask the child "Where is the (color-animal)?" Have the child bring you the card.
*Separate the mini-image from the larger image and play matching games. The younger your child is, the less cards you should start with at once. If your child is just 16-18mo, start with just 1-2 color cards. As your child masters a couple at a time, add in more to increase the challenge.
*Hide the small cards around the house. Send your little one of a scavenger hunt to collect the mini-image cards. As they are found, match them to the larger images being sure to reinforce verbally the color that they have found.
*Work on animal sounds as well as colors. "What color is the animal that says, 'Quack'? Can you find the yellow duck?"
*Thanks, Miss Kate for this wonderful idea :-)
*All of the images are the original are from the book, and sourced to me from any teacher's best buddy: Google Images.


